Restoration Tips
|
|
Tip number one. Get a shop manual! Nice originals may be found at swap meets and on eBay. An electronic copy on CD is available through The Ford Galaxie Club of America. www.Galaxieclub.com. If you like to do your own work, a shop manual is a must. Safety Tips 1. Speaking from carburetor fire experience, your Galaxie should never leave the garage without a fire extinguisher in the trunk. 2. When parking, always set the parking brake. Do not rely solely on placing the transmission in PARK to keep the car from rolling. Due to wear and faulty linkage adjustment the parking pawl in the transmission can disengage allowing the car to roll freely. It goes without saying that the parking brake must be properly adjusted. 3. NEVER NEVER NEVER get under your Galaxie or any other car without the proper jack stands properly placed. That thing weighs in at about 2 tons. It if comes down on you, it will hurt. The Build Sheet
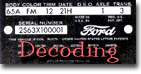
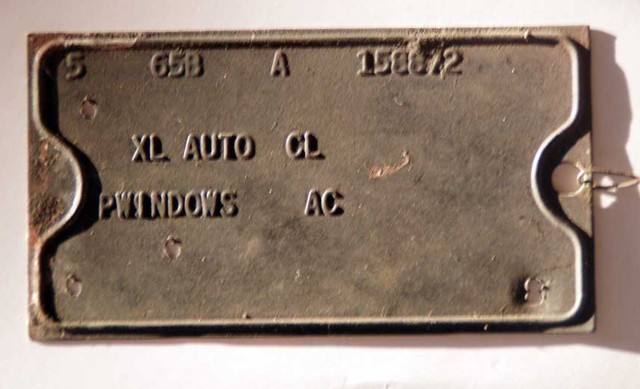
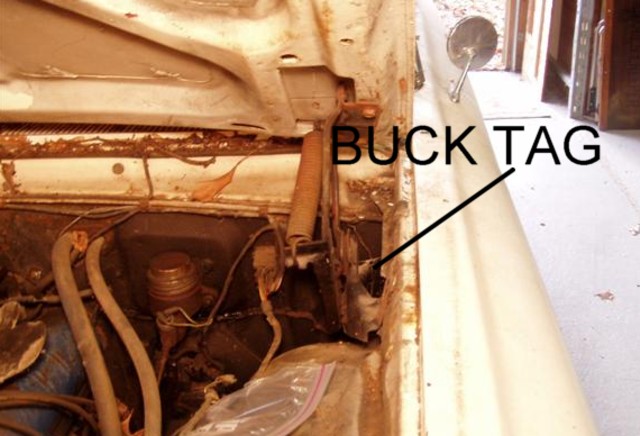
Buck Tag Recently (11/12/07) Dave Coleman and a friend discovered a tag on Dave's friend's 1962 Galaxie and then Dave found one on one of his own cars.
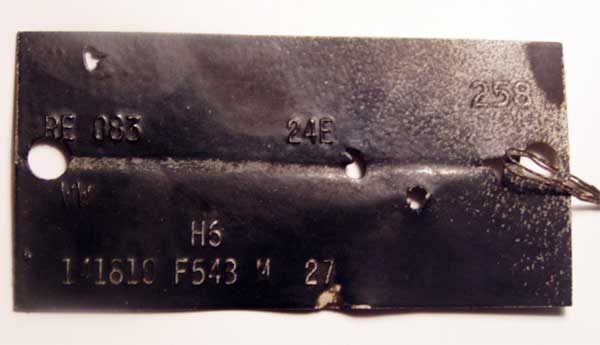
This is the tag from Dave's friend's car.
Inquiries were sent out as to what this tag was and this response came from John Rotella, Legendary Ford Magazines "Code Cracker and Director of www. Lovefords.org."
"This is a buck tag. It was originally riveted to the firewall or fender
wheel cover inside. It helps the assembly line workers know about any special
features or procedures associated with the car. Each plant had their own
distinctive way of doing the buck tags, there really was not a strict policy.
Sometimes stuff was spelled out, sometimes it was abbreviated. Some of the codes
refer to a quality control checkpoint, rotation number, etc. Very often buck
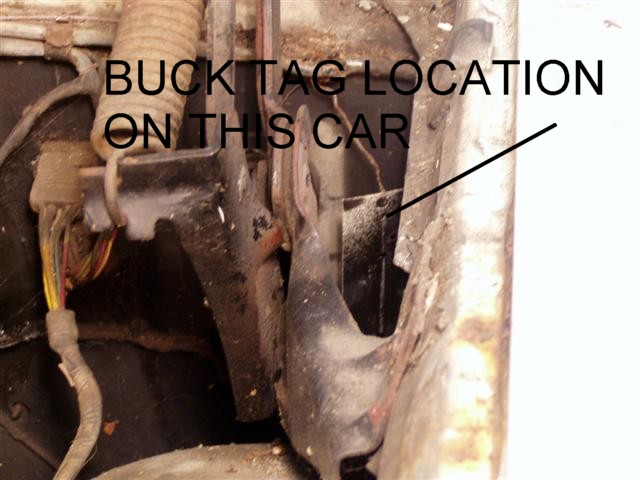
tags were removed when the car was finished. Given John's response, it is clear that the Buck Tag is yet another way to document the originality of a 1962 Galaxie or other car that has one. It is also clear that finding one of these tags on a 1962 Galaxie is a rare occurrence. The buck tag on Dave's car was located next to the firewall just outboard of the left hood hinge.
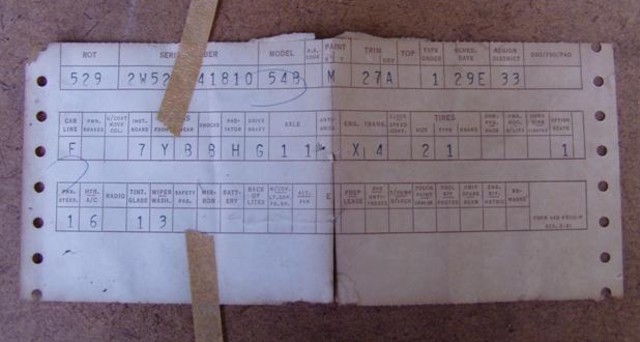
This is the tag from Dave's car.
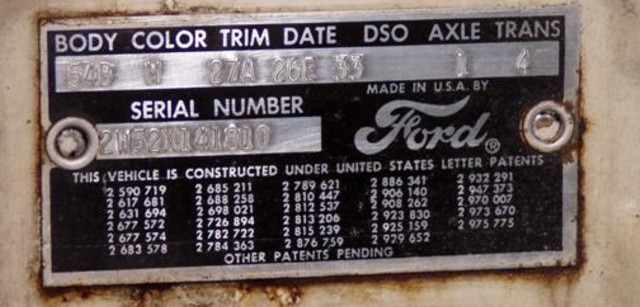
So, here are three ways to document the authenticity of a 1962 Ford Galaxie. The Patent plate is fixed to the car and is nearly always there unless purposefully removed. The build sheet and buck tag are rare and if you are lucky enough to find them, they should be preserved as part of the cars valuable documentation.
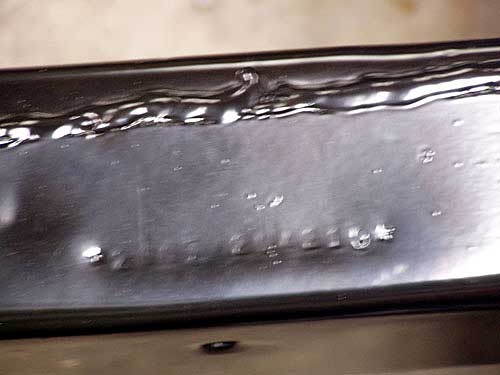
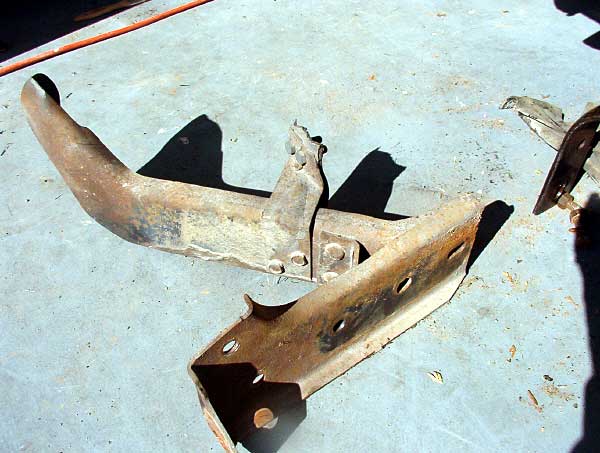
VIN on 62 Galaxie frame. To verify the VIN of your 62 Galaxie, you may find it stamped into the frame as shown in this tip from Dave Coleman of Indianapolis. "This first picture shows an arrow that points to the location of the serial number stamped into the frame just behind the front control arms. The picture was taken from the rear of the car pointing the camera towards the front.
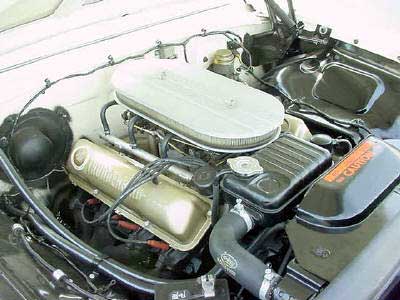
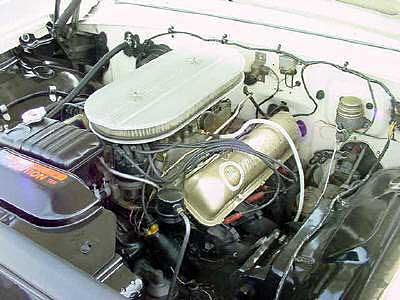
It is hard to read when looking at it and it is impossible to read in the picture. You have to clean the area well to see it. I looked for this number after I had my frame stripped and couldn’t find it. I wasn’t able to see it until I had the frame powder coated. If you clean the area with a wire brush real well you should be able to see it." Correct 1962 Galaxie G Code engine detailing These photos of Registry entry 32 show a correctly detailed 406 engine with the three 2 V carburetor option. Note the correct placement of the 406 decals on the valve covers.
1962 406 FENDER BADGE
This is the correct fender badge/emblem for the 1962 G Code cars.
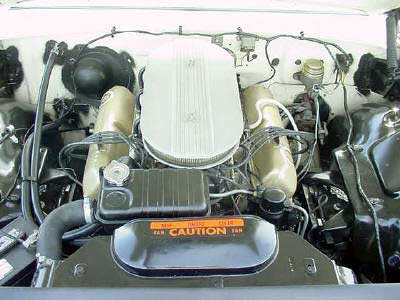
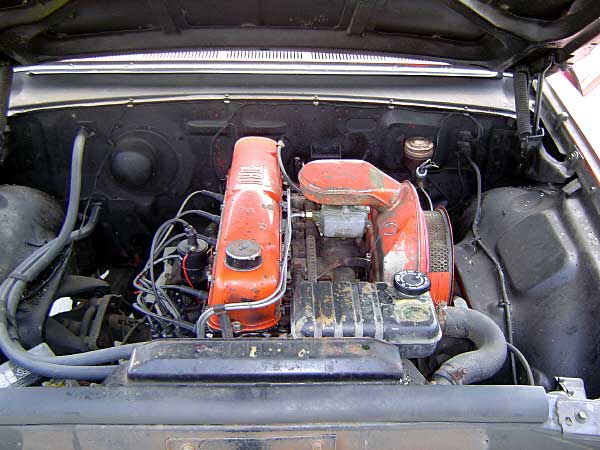
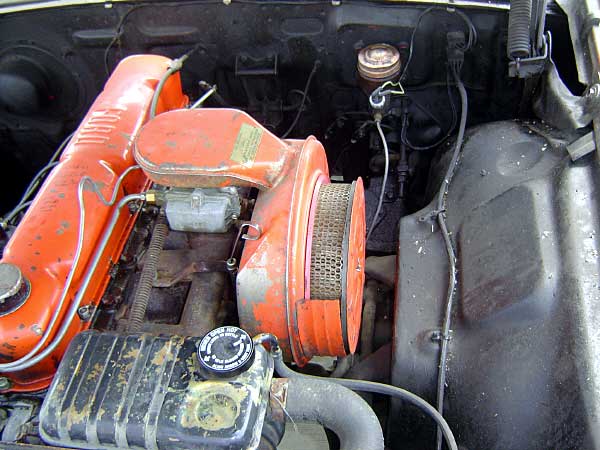
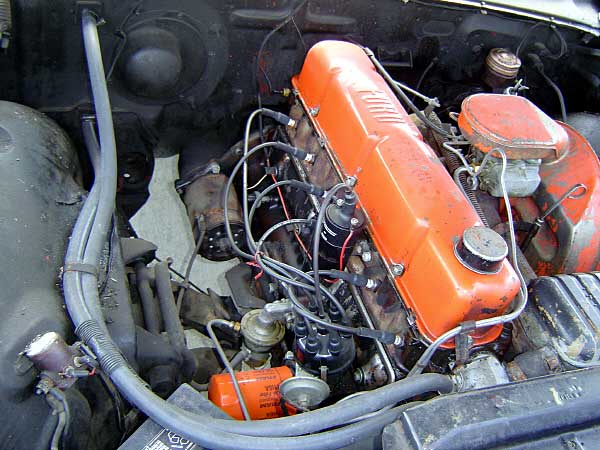
Correct 1962 Galaxie Z Code engine detailing This photo of Registry entry 1 shows a correctly detailed 390 engine. The correct valve cover and air cleaner color is argent.
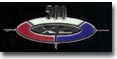
IT’S NOT AN EAGLE!
There are several verisons of the 1962 390 Thunderbird emblem on the market. This is the correct color combination for the 1962 emblem.
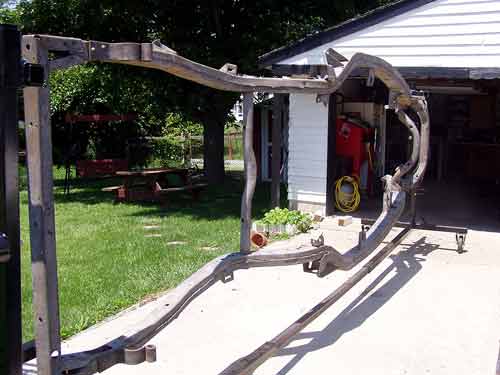
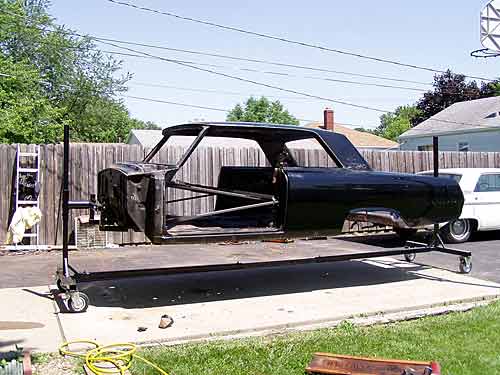
Build your own rotisserie
Bumper Tips
Mileage Maker 6
Registry Note: Since the 1950s I have been a huge Buddy Holly fan and my wife and I have attended several of the Buddy Holly tributes held at the Surf Ballroom in Clear Lake, Iowa over the years. Clear Lake is just a few miles west of Mason City. Buddy Holly's last performance was at the "Surf." Waylon Jennings was the bass player in his band. In the wee hours of the morning on February 3, 1959, following the "Winter Dance Party" show, Buddy, Ritchie Valens and J. P. Richardson," The Big Bopper" boarded a small plane bound for Fargo, North Dakota. The show the following night was at the Armory in Moorhead Minnesota. A few minutes after takeoff, and a few miles northwest of the Mason City airport, the plane crashed killing all three of the famous rock and roll stars. Through the song American Pie, this day became known as "The Day The Music Died." What does this have to do with 1962 Galaxies? Absolutely nothing, but Mr. Walters photos gave me a chance to share a little of my favorite trivia with you ......Paul Hobbs
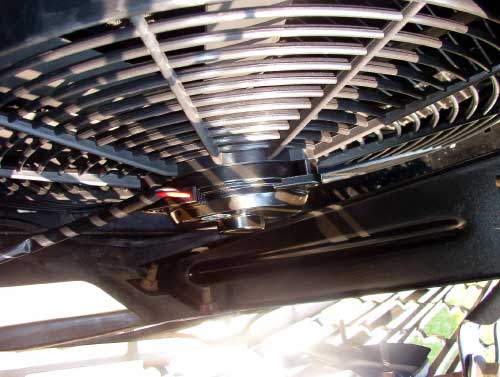
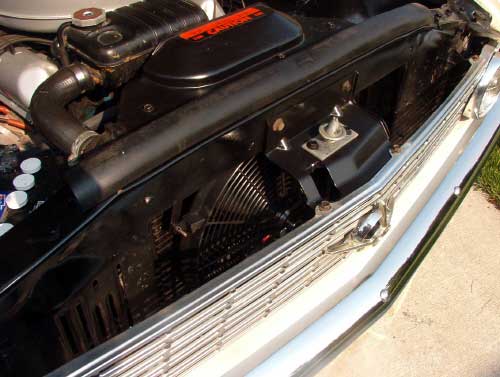
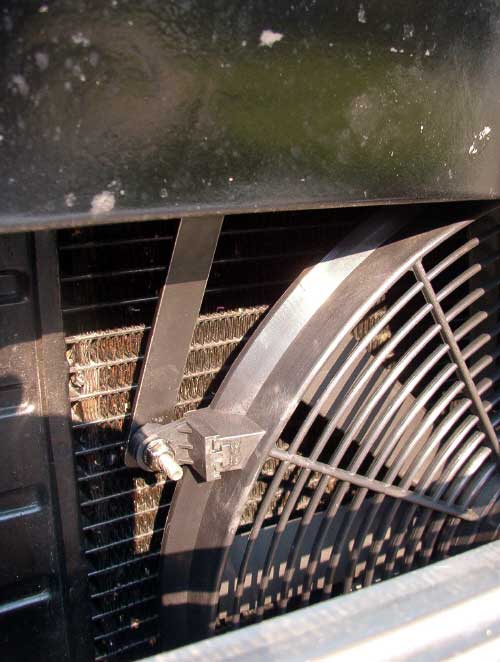
Electric Fan Installation
During the parade I tested the fan by letting the temp gauge get up to about 3/4 scale. I turned the fan on and within 2 to 3 min the temp gauge came back to normal. Test complete and satisfactory. For those who might want to get fancy, this fan comes in red, blue and yellow. It also comes in 6.5, 10, 12 and 14 inch sizes. I'm glad I went with the 16 inch. I don't believe the smaller ones could handle the heat load of a big block Ford on a really hot day. Email me if you have questions on this. Paul Hobbs
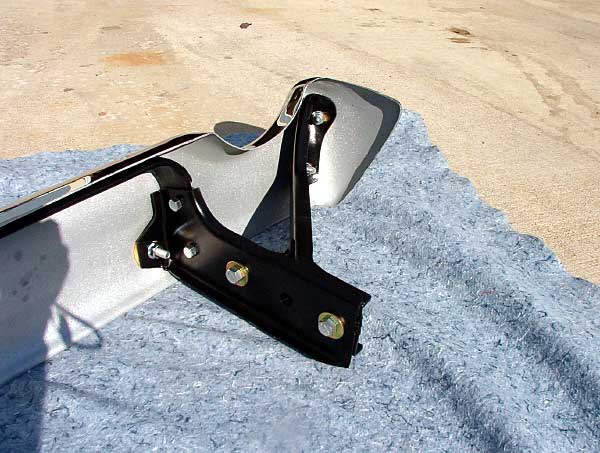
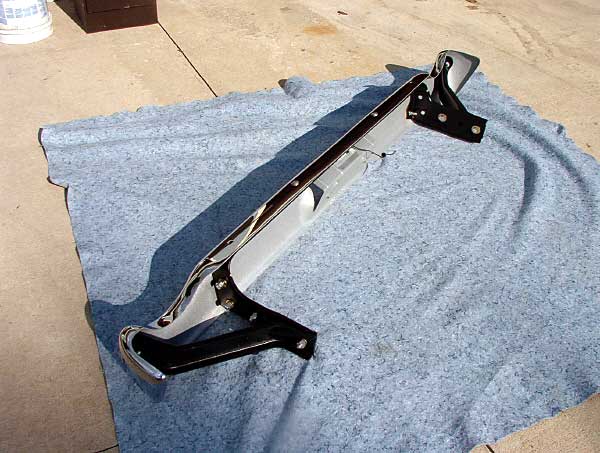
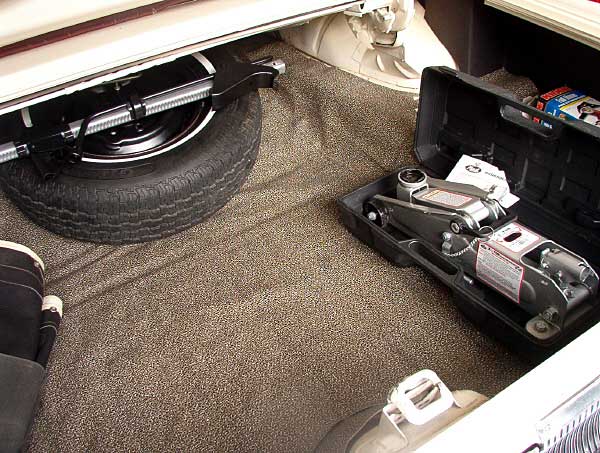
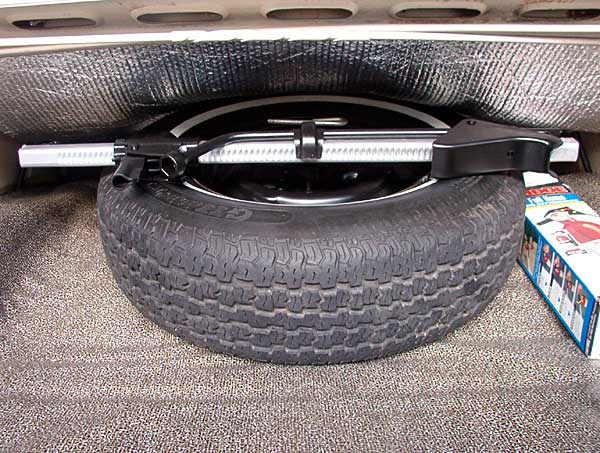
KNOWING JACK Every time I opened the trunk of my Galaxie I was greeted by a jack assembly that just didn't look very good. Also, after replacing my front bumper with an NOS one, and having my rear bumper re-chromed, it just didn't seem like the right thing to do to use that old bumper jack on those awesome looking bumpers. Besides, I never considered those old bumper jacks very safe anyway. So, before going to the 2005 Galaxie National Show in Dearborn I restored the old bumper jack and bought a hydraulic jack to use in case I had a flat tire. To restore the old jack I stripped the paint off the black painted parts of the jack and cleaned everything. I masked the plated rod and sprayed the black parts with my old standard, Rust-Oleum satin black 7777. The first coat dried with many "fish eyes." So, I stripped it again and this time used Rust-Oleum primer then the satin black and it came out great. For the jack rod, I cleaned it and sprayed it with Rust-Oleum Metalic Finish Aluminum 7715. The first coat looked like fake plating so I sprayed a second coat but before it dried I rubbed it smooth with a rag. This time it looked like the real deal. Now I have a original jack that looks great but will never be used, and a safe hydraulic jack to use for flats. Paul Hobbs
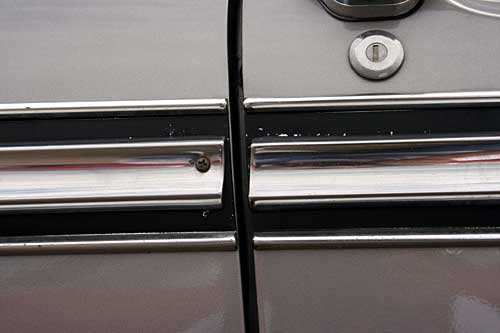
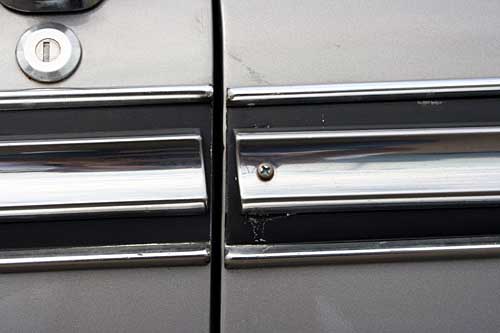
Righty/Lefty
Thanks go to Drew Belian for pointing out this incorrect trim installation at the 2005 Galaxie Nationals in Dearborn and allowing it to be used on the Registry.
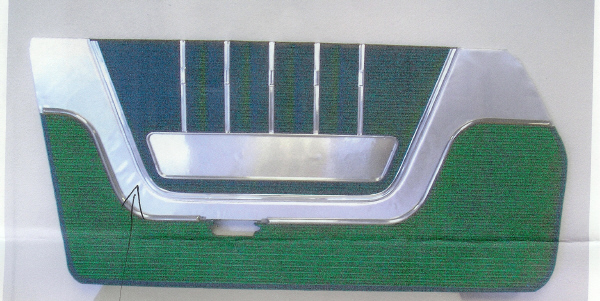
Door Panels
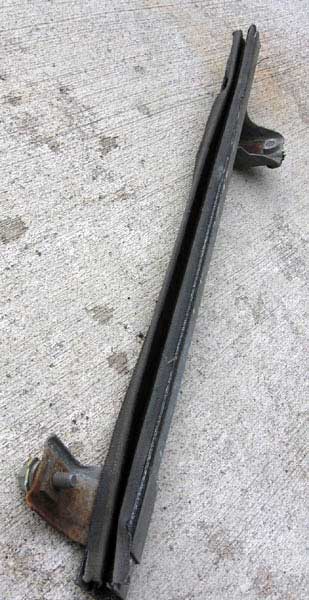
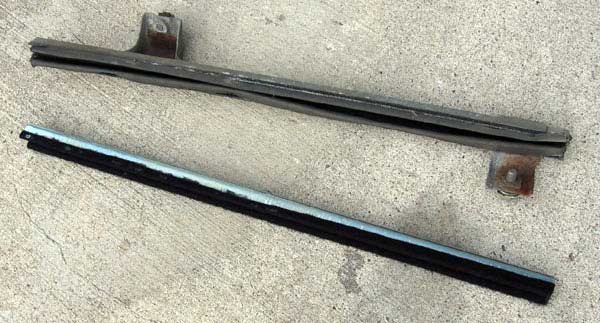
Door Glass Run Restoration The rear edge of the windows in the front door are guided and supported by U-shaped channels. These channels, located down inside the door on hardtops and convertibles, are lined with fuzzy material to prevent rattle noise and are bolted into place using a bracket on each end. Although replacement channels are available, here is a method to restore yours that will save you both time and money.
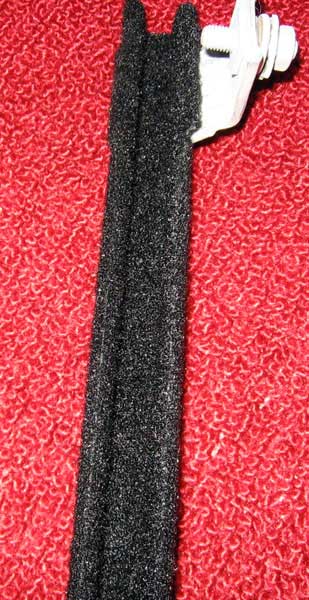
The finished channel looks great. Time will tell how it holds up and I'm guessing it will last a long time. Although the mounting brackets actually look galvanized again, they appear white in the photos due to the flash. Paul Hobbs
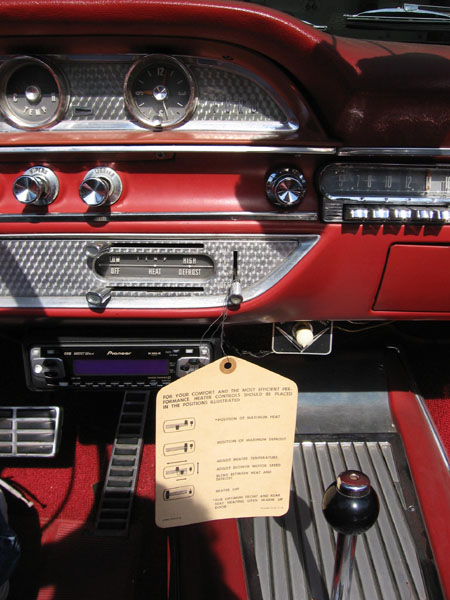
Heater Tag
For those wanting to restore your Galaxie to the nth degree, a tag like this one was attached to the heater controls. This original tag is actually from a 1962 Fairlane but matches the Galaxie controls. The only difference is that the knobs shown on the tag are a slightly different than the oval shape of the Galaxie control knobs. I do not know if the same tag was used on different models like the Galaxies, Mercurys and Fairlanes. If anyone has a tag known to be from a 62 Galaxie, a photo would be appreciated.............. Paul Hobbs
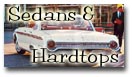
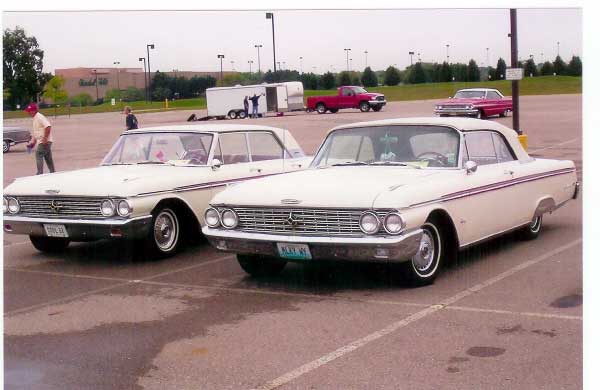
Parking light lens color
Although it's a bit difficult to see in this photo, not only the tops, but also the parking light lenses on these two cars are different. The hardtop has amber lenses and the convertible has clear lenses. Galaxie parking light lenses are interchangeable from '61 through '64. The '63 Galaxies had amber lenses and on '64s the lenses could have been either depending on where the car was assembled. Both colors of lenses are available from parts suppliers as replacements and you will see both on the cars in the '62 Galaxie Registry. It is a matter of personal choice, but to be really purist nit picky, the clear lenses are correct for the '61 and '62 Galaxies. Here is great documentation of when and why the change from clear to amber front turn signals was made. From the May 1962 issue of Motor Trend, Spotlight on Detroit feature: "Amber-colored front turn signals will appear on U.S. motor vehicles starting with the 1963 model year. The change from the white lights in present usage is being made on the recommendation of the Automobile Manufacturers Association Board of Directors. The move results from an industry-wide project started in 1958 to re-evaluate all motor vehicle lighting and signaling components. It is the first of numerous lighting changes expected in the next few years. Still under intensive study is a dual-intensity system which would increase daytime brightness of signals two to four times over that of present signals. Engineers from lamp and vehicle manufacturers taking part in the project found that amber turn signals were more easily seen than white against glaring reflections and provided greater contrast against headlights at night."
Interior Paint
Here are the paint codes for the 1962 Galaxie interior paint. This paint is all semi-gloss. See the NOTE at the bottom of the chart. Here is a tip for the upper trim on the doors of the 500/XL models. The metal has a texture to it. It is best to strip, not sand, these parts. The texture could be damaged and sanding will not get the old paint out of the tiny grooves. Also too much paint will fill in the texture.
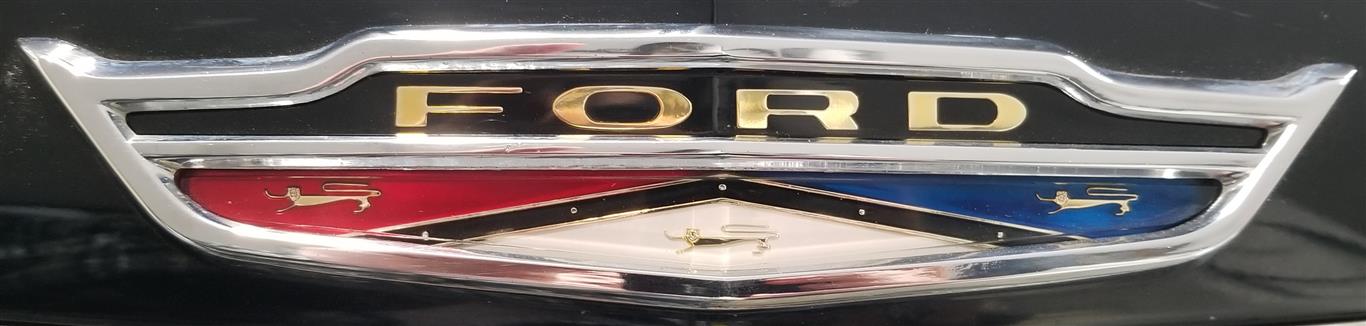
History of the Ford Coat of Arms (Daniel Jones posted this on the 1962 Galaxie Facebook page)
On Feb. 10, 1953, Ford Motor Company officials announced that the “authentic” Ford coat of arms introduced on its 1950 cars “dates back to 18th century England.” Although company founder Henry Ford’s ancestral roots go back to Ireland and, before that, England’s Devonshire region, the distinctive crest belonged to an unrelated Ford family. However, said a company statement, it “was derived by Ford stylists from an authentic coat of arms which dates back to 18th century England.” The colorful shield-like crest showed a golden lion on each of three triangular fields of red, white and blue, separated by a black chevron with gold spheres, with F-O-R-D in block letters across the top. Gold replaced silver on later versions. It first appeared on the front and rear of all 1950 Fords, one of the very few changes from the company’s 1949 Ford—an all-new, modern postwar design awarded a gold medal for outstanding automotive styling by New York’s famed Fashion Academy. The Academy bestowed a second consecutive gold medal on the 1950 model, noting its added beauty, color, appointments and appeal. The 1950 debut of the Ford crest, or coat of arms, was a departure “from almost half a century of tradition,” said the company statement. Mr. Ford, who “never developed a crest for his car,” had died three years earlier—a century after his family had emigrated from County Cork, Ireland, and settled on a farm in Dearborn, Michigan. A hero of the common man who never forgot the drudgery of farming, Mr. Ford had researched his family genealogy. Before “many” generations in Ireland, the Ford family had emigrated from the vicinity of Somerset-shire and Devonshire, England. The Ford crest served as a Ford Division logo through the 1950s and into the 1960s, when it was used on the compact Falcon, intermediate Fairlane and full-size Ford. The Ford Thunderbird and Mustang lines emerged in this period and developed their own logos, although the original 1955 Thunderbird carried the Ford crest with a pair of checkered racing flags. In “A Survey of Automotive Heraldry,” author Ellis Hillinger describes heraldry as an 800-year-old art form initially used for identification in Europe. Over time heraldic markings were used as “fashionable adornment, indication of inherited nobility or allegiance to a noble person or cause.” They were commonly used on horse-drawn vehicles and “this continued when a motor replaced the horse,” says Hillinger, but “the difference came when commercial enterprises began to use them to identify their products.” Although Hillinger doesn’t mention Ford specifically, the 1950 Ford crest would likely join Buick, Dodge and Cadillac among those “assuming the arms of someone with the same name.”
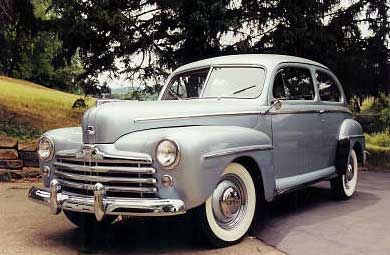
Inspiration
I know, I know. This is not a 1962 Galaxie. It is my Uncle Jack Moore's 1948 Ford Super Deluxe. He and my Uncle Frank finished a many-year restoration on this car in the mid 1990s. It is special because Uncle Jack, and his brother, my late Uncle Frank, did this restoration when they were in their 70s and 80s. Jack is now 82 and still drives the car in parades and attends an occasional show. Uncle Frank restored all of the upholstery from scratch using authentic, correct reproduction materials doing all of the measuring, cutting, and sewing himself. They worked slow and were very attentive to details. They were next door neighbors and one could say best friends. At times they would just sit in the garage sipping on a beer discussing what to do next or how to accomplish some challenging task. They worked together and enjoyed every hour of the restoration. You think you have a long project ahead of you? So what if you're in your 80s when it is finished? It can be done! Paul Hobbs
Update 7/8/07 |